He asked, "Do you really think I have time to do these extra projects?"
She said, "You like art. I'd think you'd enjoy them."
He said, "You must not get that I don't get into crafty things."
I said, "I'll decorate them, while you help the boys with homework or work on house hold fix up things."
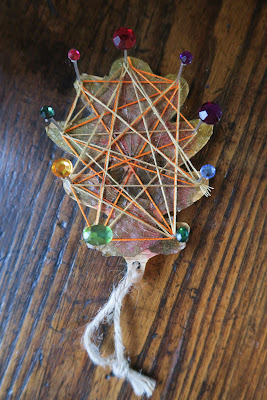
Here's a Wooden November Leaf:
Materials:
- A Wooden or Styrofoam Form
- Elmer's Glue
- Water
- A Paint Brush
- Leaves From Outside
- Any Kind of Paint or Fingernail Polish
- Nails or Stick Pins
- Different Colors of Embroidery Floss
- Scissors or X-acto Knife
There's a ton of ways to decorate it! I wanted something that Isaak would get into. I sent him outside to gather 5 leaves.
I painted it with Elmer's Glue. It works best if you add a little water to the paint.
If the leaves aren't flat, it's best to iron them. Put the leaves in between sheets of white paper, and iron them with an iron or hair straightener.
Set them in the glue. Use an X-acto Knife or small scissors to cut the leaves.
Isaak painted the tops with glitter glue.
If you are using foam push stick pins in the form on the edges. We had a wooden leaf, so Isaak hammered nails in the edges of the leaf. Lowe's Clinic came in handy with hammering!
He put a nail on every outside section of the leaf.
Get the different colors of Embroidery Floss out. Thankfully we already had some laying around. We picked fall colors.
Tie a small knot on one end, and go to town with where you want them to go. Keep doing this with different colors.
Because it's not stick pins I thought the nail heads could use some color. Travis said, "What about little gems." I went as far as gluing them on with a hot glue gun. I hated them, and ripped them off.
I just felt like the gems were too flashy for this natural looking leaf. I painted the nail heads with acrylic. I used teal because blue-green is the opposite of red-orange. You can use fingernail polish. That may stay longer over time. Finger nail polish is the same thing as enamel paint, which is used for model cars and more. I snuck some teal inside bits of the leaf too.
I think it turned out pretty good. Isaak likes it too!
Side Note: I love how his shirt looks like it has strings on it too.
What I Loved About This Craft:
- It's good for boys or girls
- It can be used for decor in your house
- It can be transformed: If you didn't want to do leaves, you could use flattened flowers and spring like colors
- It's for many ages: Stick pins and foam board bases for younger kids, and nails and wood bases for older kids
- We had everything, nothing was purchased for this craft
Have you ever created string art?


2 comments:
It turned out great! I love that you decoupaged real leaves over the wooden one.
Love how it turned out. Great job!
Post a Comment